    interface


 How to:

      select

       color

   use layers

     add text

    anim gifs

        work


 Download:

       GIMP

        GTK

     the tutor


 'office'
 [email protected]
If you want to know how to do that, open your goddamned eyes and read the following 'How to ...' Basically, when you want to overlap an image over the other, you'll need to work with layers. Just imagine them like foils of [usualy] transparent plastic you can place over the original image [background layer]. You can paint them, stick pictures on them etc. The final image will look just like you've placed your foils over the background; you'll see both the background and the decorations you've placed on your layers. You'll get two examples on how to use layers. But until then, let's take a look at your toolbar: 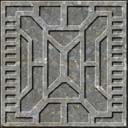
'New layer' will, obviously, create a new layer on top of the last one:
Now the new layer can be either identical with the background ('Fundal'), foreground ('Prim plan'), colored white ('Alb') or transparent (that's easy to guess). I usualy create transparent layers. But again, that's me. 'Anchor layer' will lock your layer. You won't be able to modify that layer. You can still delete it, but that's about it. You'll need to anchor layers when using layer masks. The 'Stack' submenu will help you to order your layers. You can raise a layer until it gets on top, or lower it to become a new background. The 'Color' tools work exactly like those from 'Tools'->'Color tools...'. They will have an impact only on the selected layer however, or on selections from it. Transparency and alpha masks Ok, in order to define what regions from an image are visible and what regions are transparent, pictures have a special channel (alpha channel). The alpha channel is basicaly a grey tone image. Black will make the region completly transparent, white will make it opaque, while various tones of grey will give varios degrees of transparency. You can set the alpha channel for a layer by adding layer masks (or alpha masks). When the image gets flatten, you'll get a picture that blends the layers according to your mask. Again, the 'Transform' tools work in the same way like with whole images, except the fact that they will apply changes only to one layer. You can also change the size of the layer (see 'Layer Boundry Size' for resizing to some specified dimensions, or 'Layer to Image Size' and so on). First example What we'll do is place Harrison's head on Rykov's shirt:

So, we open both images with The GIMP. Go to Rykov's and add a new layer. We also choose to see only the new layer:
Now we go to Harrison's window, select his head (free select or inteligent scissors will do) and copy it (CTRL C). Go to Rykov's new layer and paste it there. To help you maneouver, make visible the background. Move the head to the desired position and anchor the layer:
Flatten the image ('Image'->'Flatten image') and save it ...

that was it! Second example What we'll do is overlap two textures, via a layer mask
Ok, so we fire up GIMP, and open the first two images:
Add a new [transparent] layer to the dark texture. On that new layer, copy-paste the second image. Anchor the new layer (right-click -> Anchor layer):
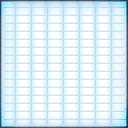
Now, you're ready to add your mask. But first, create the mask. In our case, because we want to write 'LEVEL 1' with the second texture, we'll use the 'add text' tool. So, create a blank new image, with a white background. Here we'll type using black paint our text:
Flatten the mask, (flatten image), select it (CTRL A) and copy it to your clipboard (CTRL C). The mask should look like:
Now, we go back to our first image, you know, the one we've pasted the new layer. From the 'Layer' menu we'll choose to add a layer mask. The mask will be transparent:
All we have to do now is copy-paste the mask, anchor the layer and flatten the image: