 Vis zoning:

        BSP

   hullmakers

      portals

       demo


     brushes

      nosnap

 'office'
 [email protected]
|
Ok, now hullmakers are zero thickness brushes used to improove BSP
separation. They are usually placed where a hallway takes a curve or
where you want to join two or more corridors. However, they can be used
in other places too (check out the SP Predator demo map).
First, in order to create the 0-thickness brush that will become the
hullmaker, you need to folow the folowing steps:
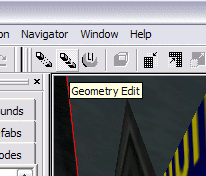
1. Switch to geometry mode
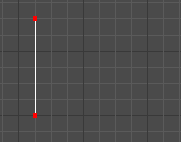
 2. Using SPACEBAR, draw a rectangle:
That's done in one of DEdit's view (top or one of the sides).
Go to one point, hit space. Move towards the second (future) corner and
hit it again.
2. Using SPACEBAR, draw a rectangle:
That's done in one of DEdit's view (top or one of the sides).
Go to one point, hit space. Move towards the second (future) corner and
hit it again.
 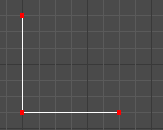 Do that until you've completed the rectangle:
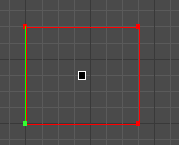 3. Switch back to Brush Edit and set the properties to your new brush:
Set every flag to false, except the 'Solid' , 'Hullmaker', 'NoSnap' and
'BlockLight'. Keep the brush to detail 0.
3. Switch back to Brush Edit and set the properties to your new brush:
Set every flag to false, except the 'Solid' , 'Hullmaker', 'NoSnap' and
'BlockLight'. Keep the brush to detail 0.
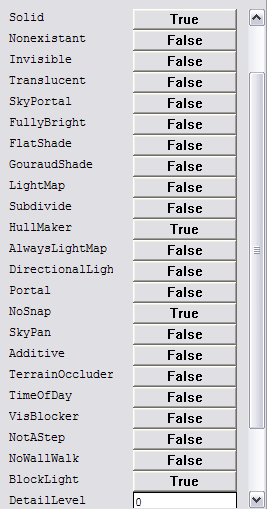 |
  Usually, keep your brushes solid,
  until told otherwise.

 Don't worry. Keep it false.


 Now, nobody will see the hullmaker
 so no need for lighting or
 shading it

 This IS a hullmaker.


  You'll get an error if you don't
 process this brush nosnapnocsg style
|
Warning!
When you have zero thickness brushes in your level, make sure they [zero
thickness brushes] all have the 'NoSnap' flag true and that you process
your level with the -nosnapnocsg option:
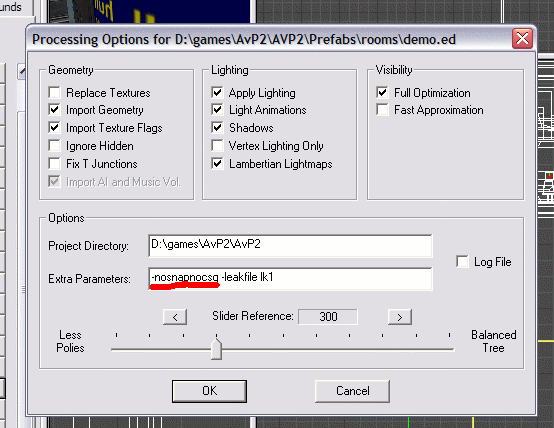 Otherwise you'll get the 'Invalid brush' error.
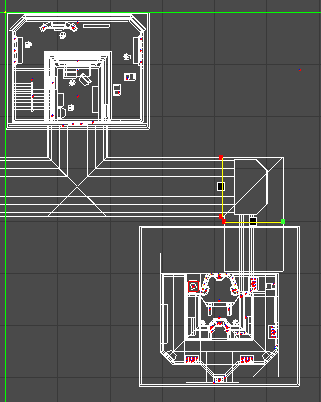
Ok, now place the hullmakers around a corner or a 3-way joining:
Otherwise you'll get the 'Invalid brush' error.
Ok, now place the hullmakers around a corner or a 3-way joining:
 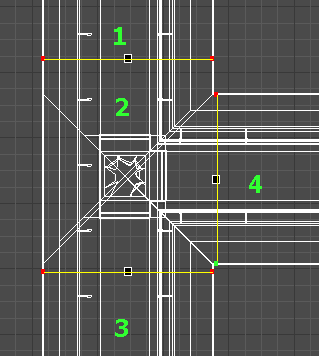 How does it work? Simple: besides the zones determined by the BSP, the
hullmakers further divide the junction in 4 zones. From zone 4 you can
see only zones 4 and 2, from zone 1 you can see zones 1,2 and 3 but not 4
and so on. Without hullmakers, the engine would have seen all 4 zones from
any point of the junction.
So, 'divide and conquer' works just fine with hullmakers ...
How does it work? Simple: besides the zones determined by the BSP, the
hullmakers further divide the junction in 4 zones. From zone 4 you can
see only zones 4 and 2, from zone 1 you can see zones 1,2 and 3 but not 4
and so on. Without hullmakers, the engine would have seen all 4 zones from
any point of the junction.
So, 'divide and conquer' works just fine with hullmakers ...
|